Wedding Recap, Part II: What I Wore
Here are the details on every single item I wore on my wedding day, as well as the journey I went on with my wedding gown...
ADORNMENT
Jewelry
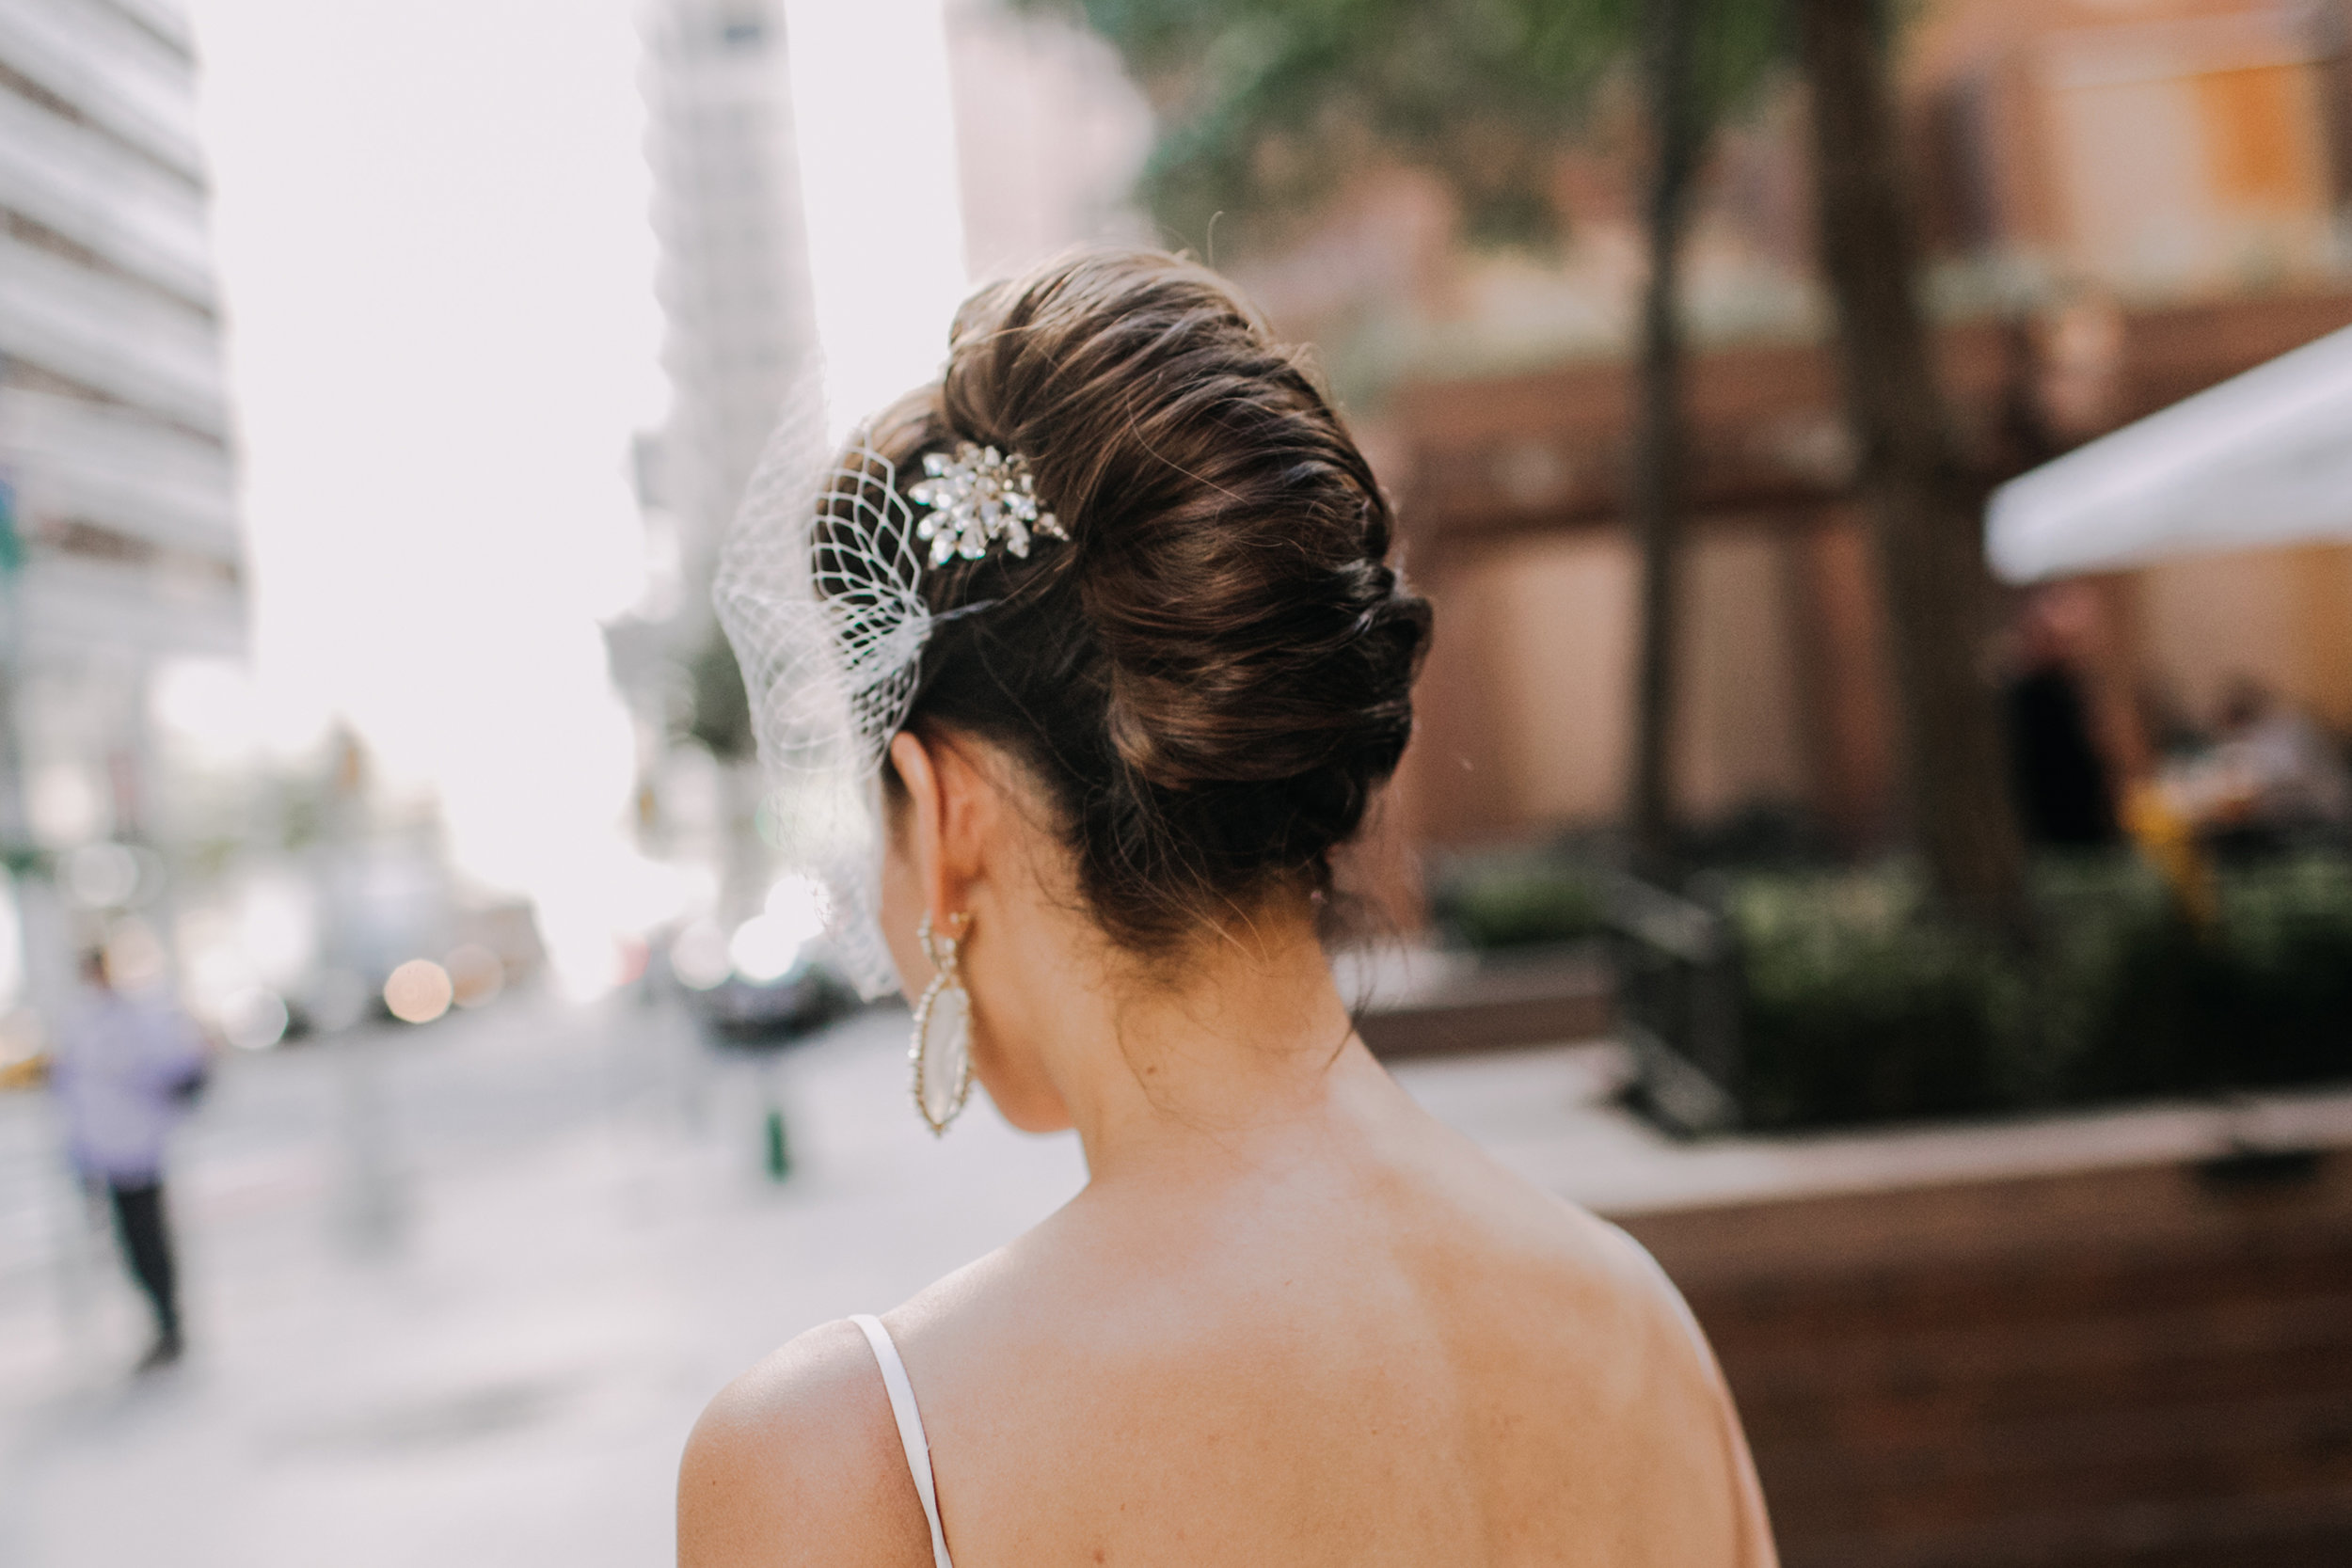
I brought 6 pairs of earrings and 4 bracelets to the hotel as my dress wasn't ready until the evening before the wedding (more on that below) and thus I'd never been able to actually try out jewelry options. I loved these Kendra Scott Katrina earrings (in yellow gold) and they were early frontrunners, but I feared they'd be too big and distracting. However, when I tried them on for my bridesmaids in my actual dress (in a panicked game I called "Rapid Fire Jewelry Selection"), these were the undisputed winner. I had (thankfully!) anticipated all scenarios and had picked up the matching Cole Tennis bracelet (also in yellow gold) in case I chose these earrings. Despite this being very much a game-time decision, I'm very happy with how they turned out. I felt like the simplicity of the front of my dress was well balanced by the drama of these earrings.
Hair
This is one of the finds I was most excited about! I had a really hard time finding a pretty, jeweled hair comb that wasn't either obnoxiously over the top or obnoxiously overpriced. ($300 for a flimsy hair comb I'll likely never wear again just because it has the word "bridal" in front of it? No thanks.) I found these shoe clips (yes, really!) at Aldo for $20. The lovely Mailey (of Beautini) secured one of them against my French twist and it was the perfect amount of hair bling. A very satisfying $20 spent!
SUPPORT
Bosom
I tried quite a few backless strapless bras, wanting to give the girls a little lift but not wanting to strain my dress' (stretch-less) bust line. I had a hard time finding one that didn't tape over past the side boob area, into where it'd be visible with how open back my dress was. This sticky bra was a surprise win as my bridesmaid Muranda actually planned on wearing it and opted for a strapless bra instead, leaving this as an unplanned last minute option. (Literally, it was lying unwanted on the bathroom countertop when I saw it and shouted, "WHOSE IS THIS AND CAN I HAVE IT.") It sticks right onto the ladies and then actually laces up like a shoe, giving them some (adjustable!) "oomph".
Bridesmaids
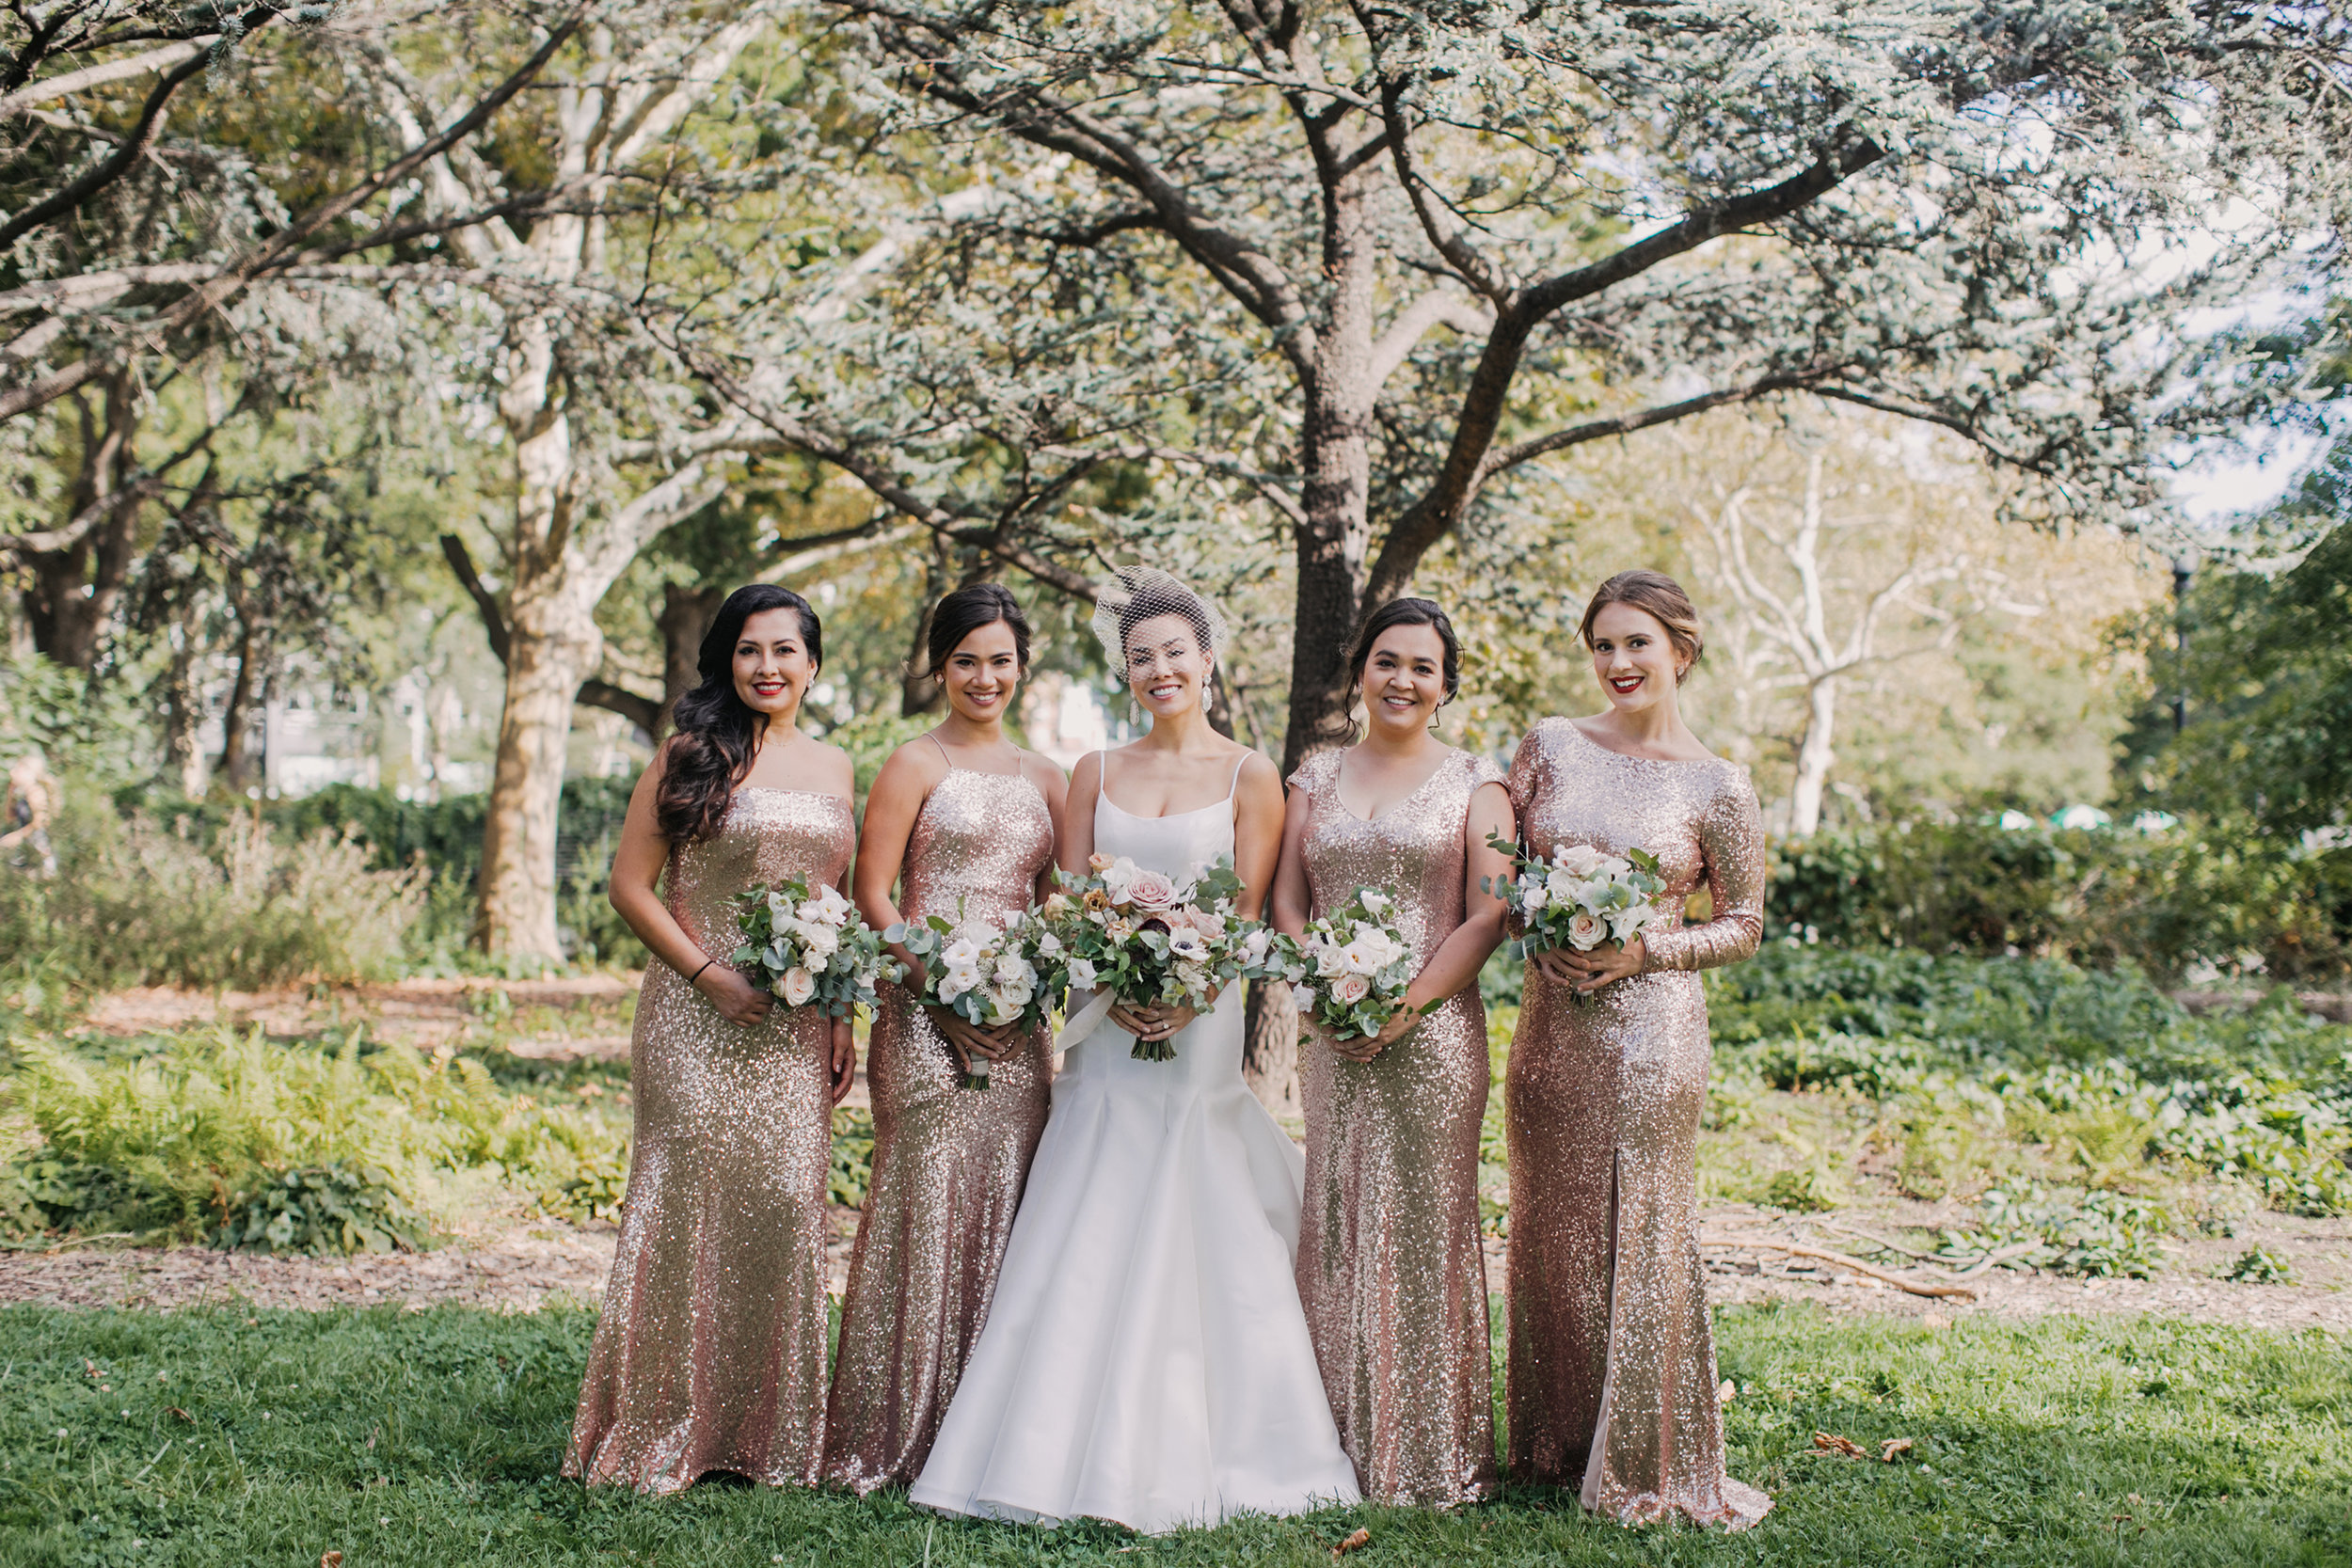
My girls wore rose gold sequined gowns from Vow To Be Chic and I am THRILLED with how they came together. As I said in a planning blog post, I knew I wanted them to match but not, well... match. Having them in the same sequin fabric guaranteed drama and cohesion, while allowing each pick out their favorite dress style added some individuality. (Future brides, if you're into this, it's very doable as the dresses are available for rent, which is great for if you don't want to make your girls spend hundreds of dollars apiece.) The girls' dresses' style names, from left to right, are: Gigi, Jessica, Kaylee, and Giselle...
On their ears, they all wore the Kendra Scott Keely earrings which matched mine exactly, except they're smaller (sans the dangle) and in rose gold. They wore their own shoes; my only guideline was that they be blush, nude, gold, or rose gold. As for hair and makeup, I had them pick whatever look they wanted in both departments, while Beautini made it happen.
FRONT AND CENTER
Veil
Like the Aldo shoe clips, my veil was another on-the-cheap find I was very proud of. After trying on big, dramatic veils and realizing how ridiculous they looked on me, I decided I wanted a fun birdcage-style veil. But again, the word "bridal" transforms a lot of cheap-to-make things into expensive-to-buy things. My search brought me to Etsy, where I was promptly overwhelmed by the veil options out there. I ultimately chose this one and have been very pleased with how it turned out. (It must be said, though, that I bought it 3 weeks out and received it 2 days before the wedding—not exactly ideal when you're already stressed about a million things. 🙈 )
Shoes
What struck me as interesting was how many people wanted to know about my shoes. I confess that though I love shoes and have my fair share of fun shoes, I didn't care so much about "wedding shoes". The most important factor to me was that I be able to not only walk in them, but also be able to last in them. Thus, I wore these sandals I already owned (you've seen them in a few blog posts already!) and have worn enough to have broken in (and to know how insanely comfy they were). They might not be the most exciting wedding shoes, but they were perfect for my needs, and I wore them for nearly TWELVE HOURS straight. Sure, I was hobbling by the end of the night, but that was the day's fault, not the shoes'. These were a fantastic investment for me.
Dress
If all you want are the details on my dress designer, its style number, and the changes I made to it, skip to the bottom of this section. If you're brave enough to take on my long-winded wedding dress hunt story, read on....
It's funny how momentous and magical we're told finding our wedding dress should be (especially Say Yes To The Dress binge-watchers like myself). I do know women who went to various bridal boutiques, tried on a dress and "just knew", and one or two fittings later, that was that. I cannot stress enough that this was SO not my experience! I had a general idea of what I wanted...
Checklist
Something very simple in terms of fabric (no embellishments, beading, or lace), yet for it to feel dramatic.
For it to feel "bridal". I wear fancy dresses all the time for singing and by now have owned dozens of gowns, so did want it to have a distinctly bridal feel; not like a regular gown but in ivory/white.
A borderline-shockingly open back, yet for the rest to be pretty understated. This was surprisingly hard to find in a silhouette that wasn't slinkier and sheath-like.
I quickly realized that it didn't seem exist out there. I toyed with the idea of getting my dress made from scratch, but by the time I felt desperate enough to go there, it was way too late. Suffice to say, my wedding dress hunt was not without stress.
The dress I ultimately wore was the second dress I bought. In fact, you may remember a collage of dresses I posted on my first Wedding Planning post and how I was still debating between a couple. The first dress I bought and planned on wearing (we'll call it Dress #1) is the third one on the top row. I ordered Dress #1 online and the generic size based on my measurements was made and sent to me. However, when it arrived, though I hadn't gained a pound, it was simply too small. Like, WAY too small. We're talking every lump and bump, having-a-hard-time-breathing small. At this point, it was 5 weeks out—I no longer had time to go to bridal boutiques and order the dress of my dreams. I wasn't even in "rush" territory anymore. I was in full-blown "last minute" territory and my options were floor samples, "in stock" dresses, and anything pre-owned. I sent Dress #1 back to the designer in Australia where an attempt to take it out would be made, but while that was being done, in case there was still a major issue, I embarked on my In Case Of Emergency Plan B.
I googled backless wedding gowns until I was blue in the face, and finally stumbled upon this photo and was immediately intrigued. I sleuthed and found it on PreOwnedWeddingDresses.com, brand new, unworn, and with tags. Unfortunately, though the seller was in New York, the dress was at her parents' in Pennsylvania. I asked to go to PA to try it on in person before buying (as opposed to ordering it sight unseen; very scary for a purchase of this price point) but she refused. She told me to try on the dress at a salon and then decide based on that. I contacted countless Martina Liana stockists and no one had this damn dress; apparently it's an older model? Then the seller told me she'd purchased it at Bijou Bridal in Ardmore, PA, and a phone call later, I learned they did indeed carry a sample and I made an appointment. I took both a bus and regional train there (it was a full day affair—the joys of living in New York and sans a car), and lo and behold, I wanted this dress. I knew I'd make changes to it (I wasn't wild about the crystal straps, for example, and I hadn't really envisioned a trumpet silhouette) but the bare bones were about 80% of what I wanted and was the closest by far I'd come to finding "my" dress...
I bought the PreOwnedWeddingDresses.com seller's dress. It was about a size too big but this was not unwelcome considering what had happened with Dress #1, so I took it to the tailor. Meanwhile, Dress #1 returned to me in the mail and fit decently well—changes would still need to be made—but by then I had my heart completely set on Dress #2. As I type this, Dress #1 is sitting, brand new and unworn, in a box under our bed—I plan on selling it soon.
The drama wasn't over, unfortunately. It took me a total of 8 (EIGHT!!!) fittings to get the dress to fit just right. There were a lot of issues, from the lining needing to be taken in more so than the outer shell, to the cups being moved and reshaped several times (the initial cups were too padded and WAY too pointy and Madonna-like for my liking), to puckering issues. The Tuesday before the Friday wedding, I was at the tailor's for 4 hours, until 11:30pm, as the finishing touches to the fit were made. It was imperative that the dress be taken to the cleaner on Wednesday morning for rush service by Thursday. When picking it up on Thursday evening on the way to the hotel (where I would stay that night), I was so terrified about it that—seriously—I had Dress #1 in the car, just in case. Overall, with a good clean and press, Dress #2 turned out beautifully and was everything I wanted in my wedding dress. But the journey just about killed me.
Dress Basics
Dress #1: "Harper" by Made With Love, Size 2 in Ivory — Opened up to Size 4 but then never worn.
Dress #2: "735" by Martina Liana, Bridal Size 8 (Street Size 4) in Ivory Silk Zibeline — Aside from alteration basics like hemming and taking it in all around the bodice, the crystal straps were removed and replaced with very thin, custom straps using the excess material from hemming. The built in cups were reduced for a more natural look, and their shape was rounded (their initial shape was a bit pointy for my liking). The back was scooped out much lower and also made more round (the original cut-out was a bit more "V"-shaped). A 5-point, 10-loop traditional bustle was added.
PHOTOS: LOVE ME DO PHOTOGRAPHY
That's it for Part II. Let me know of any questions in the comments below, and thanks for stopping by!


